Pages

Sunday, April 10, 2011

Organized Craft Space!

So I found myself all alone at my house yesterday after the hubby decided to attend a motorcycle show at the last minute (which his bike one a first place prize at, I might add!) and since it was too cold and gloomy to go out and about, I decided to ORGANIZE! I have been slowly tackling different areas of our house over the past few weeks but yesterday came time to organize my office/craft room/guest bed room (you think it serves enough purposes?!). I didn't take any before pics, mainly because it was embarrassing but for those of you who have seen it before, I started by moving all of the furniture around and then I dove in!


The whole room was moved around and organized but I won't bore you with the work part or sleeping part, just the exciting craft area!


Here is the craft corner all organized! The shelf used to be full of books that we had already read and we were never using any of them...I decided to box those up for storage or donation and put the shelf to better use! Sad to say that most of the stuff on the shelf now used to be under my sewing table which left no room for my feet and was a pain to find things when needed! I am loving this new layout!


 My fabric basket wedged in between the shelf and sewing table for easy access!

I love my little paint basket from the Dollar Tree! Here I am using one of my blue mason jars (flea market find!) for my glue sticks!

 I decided to use my mini mason jar shaker (that I found on our Anniversary trip!) for buttons! Isn't it cute?! (just so you know, it isn't that special of a find after all, Dollar General sells them for $1 too!) I also printed my blog title on a Chevron pattern and framed it! (I got my chevron print here, Sprik Space is giving them out in all different colors!)
On the next shelf, I made room for my sewing box (a birthday gift from my inlaws and can be found at Wal-Mart, love it!) and a little box of stationary (not craft specific but I need it close by too!)

Moving on down the shelf...my parents sent me the bucket on the left, it is such a pretty green print, it has all of my embroidery thread in it! I made a little label out of dropcloth and just wrote on it with sharpie, and adorned it with a fabric flower. I stuffed all of my ribbon in this vase and adorned it with a little tag! Lastly, for all of those supplies that just don't fit in a category, they were crammed neatly placed in this box!

 The bottom shelf has my "tools" (iron, staple gun, glue gun,etc.) Is it sad that my iron is in my craft room, I use it more for projects than I do for our clothes!

I did leave some space for books on the bookshelf but they all pertain to crafting, entertaining, and decorating!

I am so thankful for the time I had to get this all organized. Today I worked on some different projects and it was sooo much faster when everything was neat and at my finger tips!

Also, if you missed my big announcement about my follower celebration giveaway, check it out here!

Saturday, April 9, 2011

Latest Projects/ Important Announcement!

Happy Saturday to you! I have a few projects to show you that are the newest off of my plate! I have another one I am trying today that I will post after the weekend!

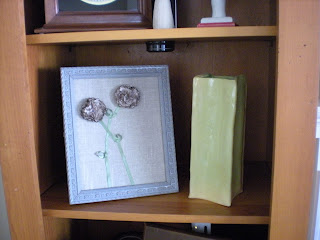
 After hearing great feedback on my previous flower art, I decided to make another for my friend Allie!

 I used dropcloth scraps leftover from my table runner for the rosettes! Since a few of you have asked how to make these flowers, I wanted to give you this link. I used the Craft Snob's directions on how to make these when I first started making them! It takes a long scrap piece of fabric and lots of hot glue but they are sooo easy to make!

 I had embroidered part of my favorite verse (Zephaniah 3:17) on some canvas a while back...not sure how I was going to use it yet. I finally decided to make a pillow out of it.I added drop cloth rosettes here too because I LOVE THEM!


IMPORTANT ANNOUNCEMENT!!!
SO I am really close to having 50 followers through blogger and I am really excited about it! It may not be a big milestone for others but I am EXCITED about it! My very favorite ETSY SHOP has offered to sponsor a giveaway in celebration of this milestone! I am not revealing the shop or prize til I reach that milestone BUT for those of you who are apart of the first 50, you will have an extra entry into the drawing than those who are not following at the time the giveaway begins! So, if you aren't following yet, do so! There are only 11 spots left!

Thursday, April 7, 2011

Curtains as Doors

Last year around this time I noticed that curtains were being used in place of doors in magazines. I loved how much this look softened up rooms and entryways! I REALLY wanted to replace our laundry room doors with curtains but the Hubby had a good argument that it wouldn't "trap the noise" as well as our bi-fold doors do, especially considering how close our laundry room is to the living room.

I still had this thought in my head, where can I put curtains?! What doors can I tear down?! In the end, I didn't find such a location in my own home (I am still plotting though!) However, it was around this time that Sista Blair and Jordan got married and were settling into their house. When they moved in, one of their bifold laundry room doors was missing! I thought, AHA! A perfect place for the curtains! Not only would this be a much cheaper option than replacing the door, but it would add some softness to the area. Their laundry room is right in their breakfast nook (as I like to call it), attached to the kitchen.

Blair hunted for curtains that would fit here but ended up falling in love with a set of sheets instead. So, she bought two sets, and used the flats sheets as curtains. She cut open the edges of the seams at one end (you know, the thicker end that is meant for the top of the bed) and slid a curtain rod through them! She mounted the curtain rod above the door and then her doors we replaced!

She also mounted tie backs so she can easy hold back the curtains when she is doing laundry! I LOVE how it turned out! They add so much to her kitchen/dining room! I love the white and tan print on her beautiful green walls!

Do you have any places that you use curtains in the place of doors? Anywhere you want to do so? It is a great look!

Wednesday, April 6, 2011

Drop Cloth Runner

So I am officially jumping on the Drop Cloth Bandwagon! There have been so many great tutorials out there and the options are limitless for what you can do with drop cloths! It is such a cheap way to get great canvas. What initially got me interested in working with drop cloths was a conversation I had with sista Blair about the slipcover we are going to make for her love seat! Our plan is to use drop cloths, I will post about it if and when we survive the project!

I also have some projects in my house that I am wanting to use drop cloths for. I recently attempted my first project using a drop cloth, a table runner. I say "attempted" because I am not 100% happy with the outcome and it is all due to paint choice on my part but ANYWAYS....on with the tutorial. I used this tutorial from A Thoughtful Place to get me started, I LOVE how her's turned out!!

First, I used another table runner to mark the width I needed. Be sure to use the edge of the drop cloth so you only have one unfinished side for you to sew or glue and it really speeds up the process!

 Cut it out....

 Iron the hem...


 Ironed hem...

 Sew that baby! Or glue it!

I decided to do straight stripes on mine, I love the Chevron but since I just did my Chevron Buffet (and since this was originally meant for my kitchen island....) I decided too much chevron might drive me nuts. Also, straight stripes are MUCH easier to tape off!! I taped the stripes 2 inches apart.

 All taped up and ready to go!

 I used newspaper as my drop cloth (notice the pun here, a drop cloth for a drop cloth....ok I am a nerd.) Sorting through the paint bucket, this is when I made my mistake! I chose gray because I am obsessed with it right now! This gray was much darker on fabric than it has been on other things I have used it for.

 I just did one coat and then some touch ups....tip here, don't do this on carpet like I did, a hard surface will really help the painting go faster, trust me!

When I peeled the tape off after it was dry, I was really disappointed! I took it in the kitchen and HATED it with everything in there....it was too dark! It looked like my kitchen island had just escaped from prison.

It was meant to go here....but ended up on my sewing table instead.


I have been meaning to put something down on the table anyways....my sewing and embroidery machines we scratching up my antique vanity top!

In the end, I guess I am satisfied?! I wish I would've tested the paint on a small section first instead of diving right in. The good news is, the drop cloth is so big, I have plenty of canvas left to make another with a better color for the kitchen!

Tuesday, April 5, 2011

Ultimate Blog Party 2011

Have you heard about the Ultimate Blog Party? Well, I just did and I will definitely be joining the party this year. If you haven't checked it out yet, click here! The party started April 1st and goes on until the 8th! They are giving out lots of prizes and it is a great way to meet blog friends! If you have a blog, come link it up!


If you are visiting my blog from the Ultimate Blog Party, I am so glad you are here! Here at Thrifty Finds and Redesigns, I share home decor ideas, tutorials on crafts I am trying, thrifty finds that I recommend, and I also show my own thrifty finds and their transformations! I would love to meet you, so please leave a comment and I will come check out your blog as well!

Also, a special thanks to Women Who Do It All for the info on the UBP!

Monday, April 4, 2011

Anniversary Weekend Finds

So today is our 2nd Anniversary! :) We just got home from a surprise weekend getaway....I knew we were going somewhere but the location was the mystery! I was super excited and surprised when we arrived in Blowing Rock, NC!! I went to school at Appalachian, and even though we were long distance at the time, we have SO many memories in that area. It was so much fun reliving all of those favorite memories and just being away together! Ok, so enough blabbing about how thoughtful and great my hubby is! :)


We did a little shopping while we were out and I wanted to share my finds with you!


Here's a picture of some of our finds. Yes, I am a nerd who takes a picture of everything altogether :)

My first finds are from Mast General Store in DT Boone!

I love our new Wasp Catcher! I was drawn to it because I thought it was so cute and the fact that it catches pesky wasps was just a bonus! The $9 price tag helped as well!

Wow, this pic is blurry! This little thing was hard to photograph! It is a little "shaker" for salt, pepper, or whatever. I am going to use mine for cinnamon sugar! It is a little mason jar, and it was on 99 cents!

 We also visited Farmer's Hardware in DTB. (also known as Farmer's Daughter(haha Tay)) 

 We bought this beauty there. It was 50% off and we just loved it. We can always use an extra touch of Jesus :)

 I am in LOVE with this little shop, Bless Your Heart. It is on 321 between Boone and Blowing Rock. 

 I bought this new mini cloche there, and I LOVE it!!!

Two of the new finds found a home on the buffet! :)

 We also visited a few thrift stores....

I found these little cuties there for $2 each. You can see I am feeding my Rooster Obsession!

We also visited the Blowing Rock Outlets, where I bought some new cuties at the Coach outlet. I am loving my new cosmetic bag and clutch!

No worries for those of you who are worried about Gabe, he got some new motorcycle accessories as well as new sunglasses!

This weekend was amazing! Can't wait to escape again soon!

Friday, April 1, 2011

A few Spring touches...

So happy we are finally seeing some sunshine today! I hope it stays sunny and warms up! The hubby and I are going on a weekend getaway to celebrate our 2-year anniversary! I am sooo excited! He planned the whole thing and I have yet to be told any of the plans, which makes it all the more exciting!

I am still adding some touches of Spring in the house and yesterday/today, I am adding a few more. I have made a few wreaths for inside but wanted one for the front door. The other day I bought a grapevine wreath from Wal-mart for $3. I love the natural look of a grapevine wreath and I thought it was a great place to start!
 
 
 I then added a little sign that I had lying around. It used to say something else on it, but I repainted it and added our name with stickers.

I then added fabric flowers, which I have been obsessed with creating lately! I made the two green rosettes out of ribbon. The bigger flower is made out of lots of fabric scraps. I used my glue gun to turn it into something like a flower. I glued all three flowers to ribbons that I tied around the wreath. I could've glued them right on to it but I wanted to make them removable just in case I want to change it up later.

 And here it is altogether on the front door!


I also made some other "flower art" for our living room. When I ordered my Glass Cloche from The Boomin Granny, they sent me the cutest paper flowers made out of newspaper. I new that they would eventually come in handy but I just couldn't think of what to do with them right away. Last night, I found an old gold frame in my closet and decided to get creative.

I started by using my new favorite Spray Paint color and repainted the frame (shown below.)


 While the paint was drying, I covered the frame backing with fabric, glued on my paper flowers, and glued on ribbon to act as the stems.


 Once my frame was dry, I put it altogether!


 Here it is in it's new spot!

I am really liking it, it is simple but adds just a touch of Spring! It was so easy, if I didn't have the flowers pre-made for me I could've used fabric, paper, or even tissue paper to make flowers too.