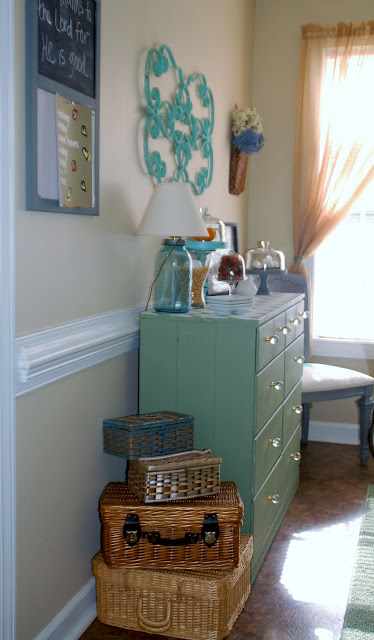
About a month ago I was visiting my parents and my mom gave me three baskets. One was a large picnic basket and the other two were antique sewing boxes. When she gave them to me they were all stacked up on the floor. When I got them home and tried to place them in our house, that image of them stacked on the floor kept coming to mind. I decided to add another picnic basket to the stack and found a good spot for them in our dining area.
The sewing boxes are so cute...
I think they add a lot of character and fill a void space in our dining area...
I also wanted to show you some of my subtle fall decor in the dining area...
A simple mini pumpkin vase filler in my mini cloche...
A mini pumpkin in a cloche...
Corn kernels with a candle...
Here's a shot of the bar cart with the buffet...
Here's a shot of the whole dining area...I pointed out some things I have written about recently...
To see this things up close and to see how they came about check out the links below...
Free Fall Printable
Blueberry Basket Centerpiece
Burlap Wreath
Bar Cart
Chevron Buffet
Thursday, September 29, 2011
Wednesday, September 28, 2011
Old Door Inspiration
This post is in honor of my brother....he and I were having a conversation about redesigning and refurbishing old furniture and doors. Which inspired me to do a little searching for inspiration on what can be done with old doors. I know there are so many things out there that people have made with old doors. I wanted to show you a few of my favorites. Be sure and check out the link under each picture for the owner's post on how they made it!
The first one is definitely my very favorite....a privacy screen made by linking together 4 old doors using their hinges to connect them.
The first one is definitely my very favorite....a privacy screen made by linking together 4 old doors using their hinges to connect them.
I also love this coffee table out of an old door...
This desk is so cute...they used two saw horses as the legs and put a piece of glass on top to give it a flat surface...
How cool is this couch?!
With a matching chair...
I hope that inspires you to do something creative if you ever come across an old door! I am definitely on the hunt for the perfect weathered old door!
Monday, September 26, 2011
Framed Chicken Wire Memo Board
A couple Saturdays ago I completed another project that was inspired by a pin on Pinterest.
So here is what I made....
Here is how I made them:
Supplies:
Frames
Chicken Wire
Spray Paint
Staple Gun
Wire Cutters (Tin snips)
I bought 3 frames from a local thrift store, ranging from $2-3 a piece...
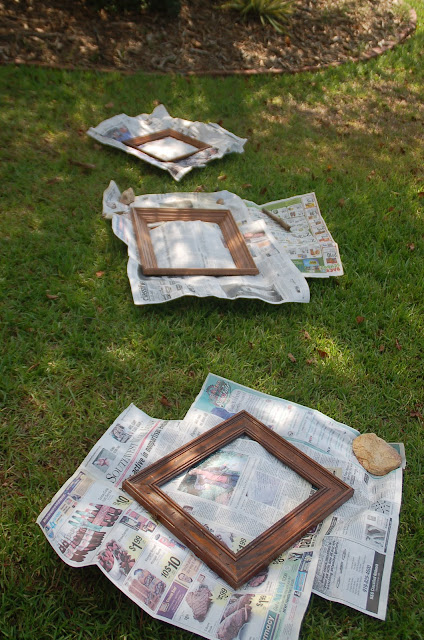
Then I took them apart, and laid them out on newspaper and spraypainted them each with several coats of paint.
Once the paint was dry, I used the frames to measure how much chicken wire I would need for each frame. It does not need to be exact, it should actually be bigger than the frame to allow room for error.
Use your wire cutters to cut out the chicken wire.
Once your piece is cut, use a staple gun to staple the chicken wire to the back of the frame.
Here is a close up of a staple on the frame.
Once the whole piece is stapled, there will be excess wire that needs to be trimmed...
You will need your wire cutters again to trim the excess...
I used needlenose pliers to bend back the wire around the staples to ensure that the wire was secure. That is all it takes! The longest part is waiting for the paint to dry.
You could use clothepins to hang little notes and pictures on it. You could also hang earrings and necklaces from the wire.This was such a simple project and I will definitely be making more in the future. These are all gifts, one already lives with Emily and the other two have not been "delivered" yet, can't wait to see what their owners do with them!
Saturday, September 24, 2011
Chalkboard Table Top
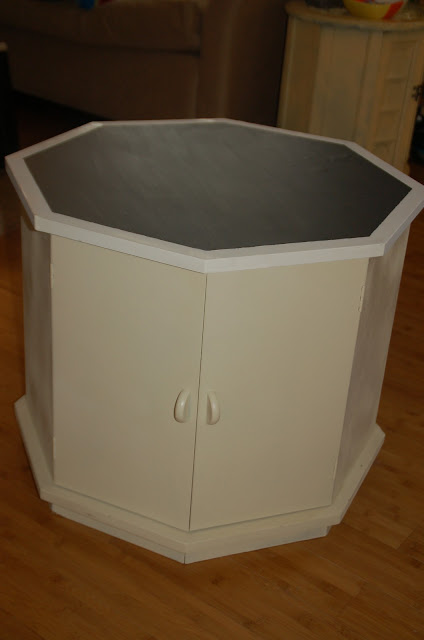
About a month or so before we got married, we started shopping for apartment furniture. We bought some end tables at yardsales and thrift stores and spray painted them all the same cream color. It was a good choice since we didn't know what other furniture we would end up with and wanted a neutral and cohesive look. All of the tables survived the apartment and moved to the house with us. One of the tables in now in between two chairs in our living room. It gets a lot of coaster and drink action, as well as card game action. Some nights we like to sit in our chairs and play a friendly game of cards on it.
It has gotten quite a beating on the top and needed a paint makeover (a paintover maybe?). I thought a chalkboard table top would be a perfect option for keeping score and leaving each other little notes.
Here it goes....this is what the final product looks like....
This is how I made it....
I taped off the edges...to create a border....
And then I started painting.....
I used Rust-leum's Chalkboard Paint....it has instructions that were written for patient people, which I am not, so I used a hair dryer in between coats and painted a total of three coats.
Once the paint was dry, I peeled off the tape. It didn't work as well as I had hoped and had to touch up the border with cream paint.
Then I "cured" the chalkboard by rubbing chalk all over it...
Then I wiped it all off...
Then it was ready to go...
This was sooo easy to do and gives us a fun table top to draw and write on. I am really happy with it!!!
Friday, September 23, 2011
Cheap and Easy Fall Vase Filler
I picked up some foam gourds and pumpkins from the dollar store the other day....
And decided to spray paint them a creamy white. I put them in a box but the power of the spraypaint just blew them all over the place so I had to hold them while I painted them.
I should've worn a glove :)
I let them dry in the box....
My original plan was to put these on my grapevine wreath for my front door.
It was extremely obvious how cheap my pumpkins and gourds were and I was unhappy with the outcome. I wasn't about to let $5 worth of gourds and pumpkins go to waste though, so I put them in some vases to use as Fall decor.
Even though it wasn't what I originally planned, it turned out to be a cheap and easy vase filler for my fall decor. I'm bummed that my original idea didn't work out but it was nice turning a failure into a success. Plus, i'm really happy with what I ended up doing to my fall wreath.
Wednesday, September 21, 2011
Bar Cart
A few weekends ago, I found a bar cart at a local thrift store and fell in LOVE with it! It was one of the those finds that the price was too perfect to pass up BUT I wasn't 100% sure of where it was going to go in our home. Well I made it work and I am loving it so far! There is something still missing but I wanted to go ahead and show it to ya....
Isn't she beautiful?! I decided to leave her completely AS IS. I may touch up some of the paint but I am not changing it much more than that. I love it's character. The mirror bottom and glass top were wrapped up when we bought it, so the mirror was a complete surprise when we got home. I really like it!
Once I found a new home for our new cart, I decided that I want to use it as a bar cart. It will be great for serving drinks of any kind. My mom has always had a specific place set up to serve drinks for when she entertains....I have always wanted a spot perfect for that, and now I do!
My wire garden cloche found a home on top of my large chalkboard slate. I also put my wine bottle holder (a $3 thrift store find) that I found a while back, down there to hold wine bottles for easy access.
The top shelf now holds my ice bucket, my new chalkboard wineglasses, my vintage mixer, and a galvanized bucket with bar tools.
I feel like something is missing but I can't put my finger on it! I think it will be perfect for serving drinks, it is located perpendicular to my buffet in our dining area, which will be perfect for entertaining. I think bar carts have a ton of character, I was lucky enough to find this one at a steal but they aren't always that affordable. So, if you find one at a good price, be sure and snatch it up!
Isn't she beautiful?! I decided to leave her completely AS IS. I may touch up some of the paint but I am not changing it much more than that. I love it's character. The mirror bottom and glass top were wrapped up when we bought it, so the mirror was a complete surprise when we got home. I really like it!
Once I found a new home for our new cart, I decided that I want to use it as a bar cart. It will be great for serving drinks of any kind. My mom has always had a specific place set up to serve drinks for when she entertains....I have always wanted a spot perfect for that, and now I do!
My wire garden cloche found a home on top of my large chalkboard slate. I also put my wine bottle holder (a $3 thrift store find) that I found a while back, down there to hold wine bottles for easy access.
The top shelf now holds my ice bucket, my new chalkboard wineglasses, my vintage mixer, and a galvanized bucket with bar tools.
Here are more pictures...
I love the wheels, they are so vintage...
I feel like something is missing but I can't put my finger on it! I think it will be perfect for serving drinks, it is located perpendicular to my buffet in our dining area, which will be perfect for entertaining. I think bar carts have a ton of character, I was lucky enough to find this one at a steal but they aren't always that affordable. So, if you find one at a good price, be sure and snatch it up!
Subscribe to:
Comments (Atom)


